- Ali
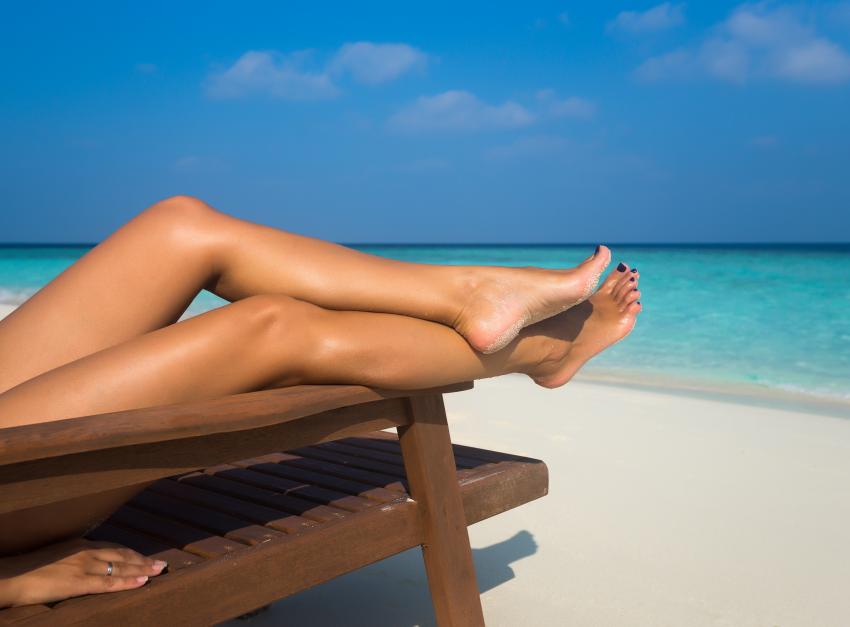
There’s still time to get your legs beach ready. Here’s how
It might feel like the British summer has been and gone but if you’re heading for sun, sea and sand you’ll still want to get your legs out. Or maybe you’re just feeling the chill and sticking with short skirts and sandals anyway – after all you only get one chance to wear your summer clothes in the Uk and this is it! So whether you’ve been prepping with kale and spinach smoothies for weeks or doing a lot less than that there’s still time to get your legs beach ready. Here’s my top tips for prepping your skin, tanning your legs and exercises to create a long lean silhouette.
Eat Right
If you really want to kick your body into shape then my 14 or 30 days to healthy living plan is where I’d start. It is designed to help you shed excess pounds and create a long lean physique by reducing toxins and eliminating foods that don’t serve you. Here’s more details about how it works.
If you’ve left it until the last minute and you’re away within the week now is the time to ensure you avoid any inflammatory foods and eat lots of foods which are low in carbs and high in protein. I’d advise cutting out salt and sugar from your diet the week you plan on breaking out that new ‘teenie weenie polka dot bikini’ too. White bread and white flour can make your body retain excess water which will show up in your physique. Cutting back on alcohol and carbonated drinks as well as raw vegetables which can cause puffiness like broccoli and cauliflower will help too.
Try Dry Skin Brushing
If you’re not already an advocate of dry skin brushing start now. This simple technique helps your skin, the biggest elimination organ we have, to shed toxins more quickly and will brighten and smooth skin. I make this a morning ritual before I jump in the shower.
How to get started
Use a special natural bristle brush to brush along the entire body starting at the feet and working up the legs, thighs, stomach, arms, chest, breasts and face. Don’t forget your back too. Use long sweeping strokes moving upwards towards you heart. Pay special attention to the back of the legs, elbows, and knees, especially if you are applying a fake tan.
Three Days to go: Prep Your Skin
On the morning you plan to schedule your hair removal, exfoliate and moisturize the skin in advance at home so your skin is as prepped as it can be before your treatment. Here’s my favourite moisturiser. I find this really hydrates and helps to improve the appearance of dull, tired skin as it contains the natural seed oil from Anise. Vitamin B5 in I helps to create the look of soft, smooth skin and shea butter which is deeply hydrating means I can say goodbye to dry patches.
Make sure any waxing you’re having done happens at least 72 hours before you’re exposed to the sun. It’s important that your skin is calm and that any trace of redness is gone before you put on your swimsuit and expose the area to sun and sand.
Two Days to go: Schedule a Pedicure or use a home treatment
Make sure your feet are beach ready with a lovely pedicure or home treatment. You can slough off the effects of dry heels with this amazing cooling foot cream.
Apply it all over the feet and if heels are particularly dry wrap the feet in cling film and then in a warm towel for 10 minutes to help the cream absorb. Remove towel and cling film and gently scrub away any dry skin on the heels with a foot file to reveal soft, summer-ready feet. To prolong the benefits of your pedicure apply a small amount of moisturizer to the bottoms of your feet after your morning shower in the days that follow. This will help lock in the hydration while your skin is still semi-wet.
For the most beach-friendly toes, pick a chip-resistant polish that pops against your skin colour. Today the choice of colours is endless. I either opt for the same colour on my fingers and toes or try to complement my finger colour with the same colour but in a brighter shade on my toes!
Start to create your Tan
A ghostly white is no way to start your holiday. Sadly for me I tan so little that I often come home a shade or two lighter than I went unless I keep applying my tan while I’m there! If you’ve been following my routine above your skin should already be well exfoliated and moisturized by this point to prevent fake tan from streaking. I’ve found this to be the best fake tan there is
It’s a natural colour and can be built up in layers of colour over a few days. I love to mix it 50:50 with my moisturiser before applying with a mitt to keep palms from turning brown too. I find this helps to distribute the colour more evenly and for me gets a really natural shade. Make sure you wash your hands immediately after you’ve applied it and allow at least 10 minutes to dry before putting on loose clothes. You’ll see the colour developing in the first 4 hours but for the best effect don’t shower for at least 8 hours. I love that fact that I don’t smell like a digestive biscuit having used this tan and that I have a lovely glowing colour to my skin and am moisturised too.
The Day of the Big Reveal
While your newfound tan may look great, it won’t protect you from the sun’s harsh rays. Generously layer on SPF and reapply every two hours. Here’s my favourite.
Although it’s a kids brand it works for all skin types and is so gentle but effective it’s my go to product when i’m out in the sun.
For an added healthy glow in the evening, add a drop of natural oil to your moisturiser to give you that glow. My favourite is this detox oil.
It’s really hydrating and contains grape seed oil to support collagen and skin firmness and sesame seed oil that moisturises and helps dimpled skin appear firmer.
Most of us dread the thought of revealing our bodies in a bikini but with a bit of prep and a healthy living plan you can kiss swimsuit phobia goodbye.
Here’s my top leg exercises to ensure you have long lean limbs this season.
You can do all these exercises with or without weights for a solid core and wobble free thighs.
One-Legged Deadlift
- Stand with feet hip-width apart and hold ketlebells with palms facing up in front of your thighs.
- Find your balance, lift your right foot off the ground and bend right knee behind you.
- Lean forward, lowering your torso parallel to ground while lifting your right leg behind you. Keep your leg straight.
- Keep you left knee slightly bent, thigh contracted and back straight, bringing weights toward ground. Go as far as you can without losing your balance.
- Return to standing and repeat for 1 minute; switch sides and repeat.
Deep Side Lunge
- Stand with your feet parallel and hip-width apart. Holding your kettlebell horizontally between both hands at chest height, elbows bent.
- Take a slow but big step (2 feet) out to the right side.
- Keep both feet in line with each other.
- Bend right knee 90 degrees, keeping knee aligned over second toe.
- Place dumbbell on ground by right foot and hold for 2 counts.
- Step back to start.
- Repeat side lunge to right, this time picking up the dumbbell.
- Continue deep side lunges for 1 minute, lowering weight and picking it up; switch sides and repeat.
Lunges in the round
- Stand with your feet parallel and hip-width apart holding a kettlebell in each hand.
- Take a step out to the front to create a forward lunge. Return to centre.
- Using the same leg, take a step out to the right side to create a lunge on the right. Return to centre.
- Again using the same leg, take a step out to the left crossing the feet behind you for a curtsy lunge. Return to centre.
- Repeat all 3 lunges to left.
- Continue the lunge routine for 2 minutes repeating each side.
Weighted Bridge
- Lie on a mat on the floor with knees bend and heels on the ground about hip-width apart.
- Hold one kettlebell in each hand with arms extended, thumbs pointed in toward the middle of your chest. Keep the weights parallel to your chest and lift hips into a high bridge, tightening your glutes.
- Hold this position for 1 minute and alternate slow-motion punches over your chest.
- Lower to the floor and rest.


